
Import a project (translationCore 3, USFM or Scripture Burrito)
Bring existing work into tC4 as a new project, from translationCore 3 project zips, USFM files or a Scripture Burrito zip.
Each import creates a new project. Nothing on this computer changes until you click Import as a new Bible.
Steps
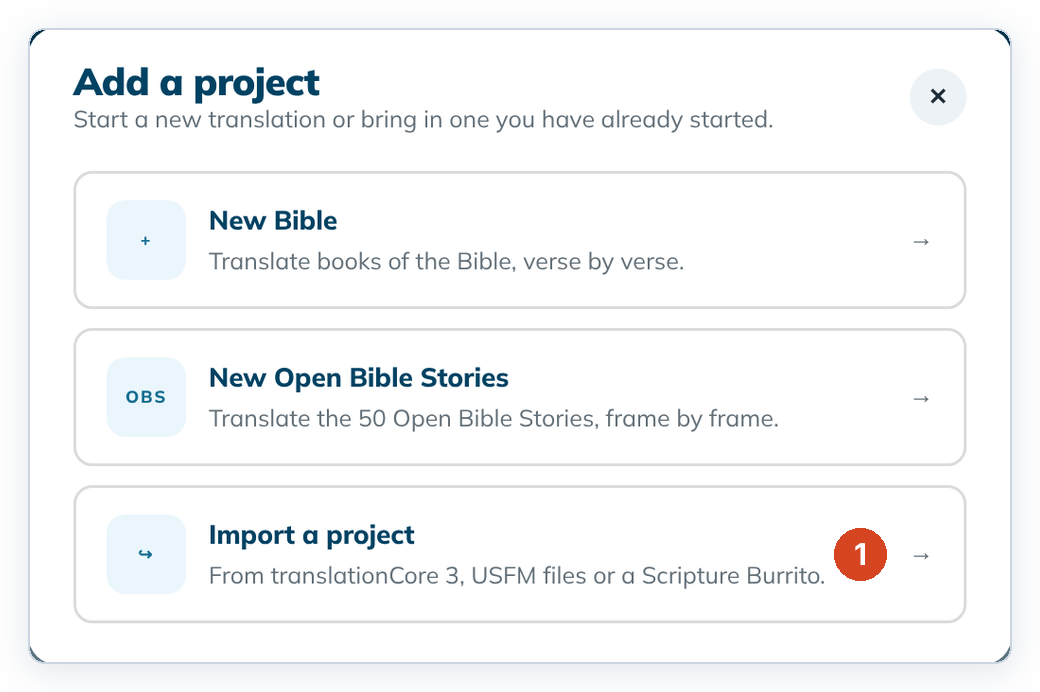
- On Home, click + Add a project, then Import a project (1).
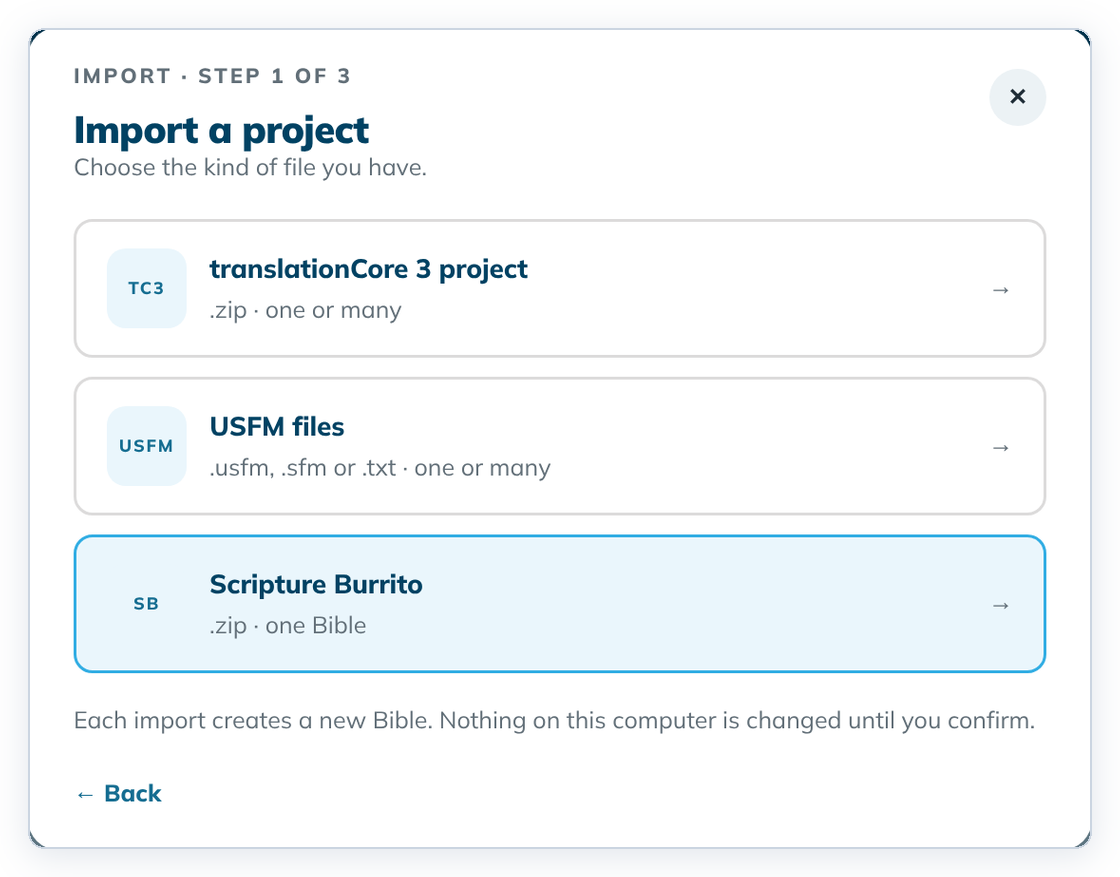
- Choose the kind of file: translationCore 3 project, USFM files or Scripture Burrito.
- Drop your files on the drop area, or click it to choose them. Remove a wrong file with its ✕.
- Click Review files →.
- Read the review. A green dot means all is well. An orange dot means you need to act.
- For a translationCore 3 project, choose Look up on Door43 (needs the internet) or Use installed versions (1).
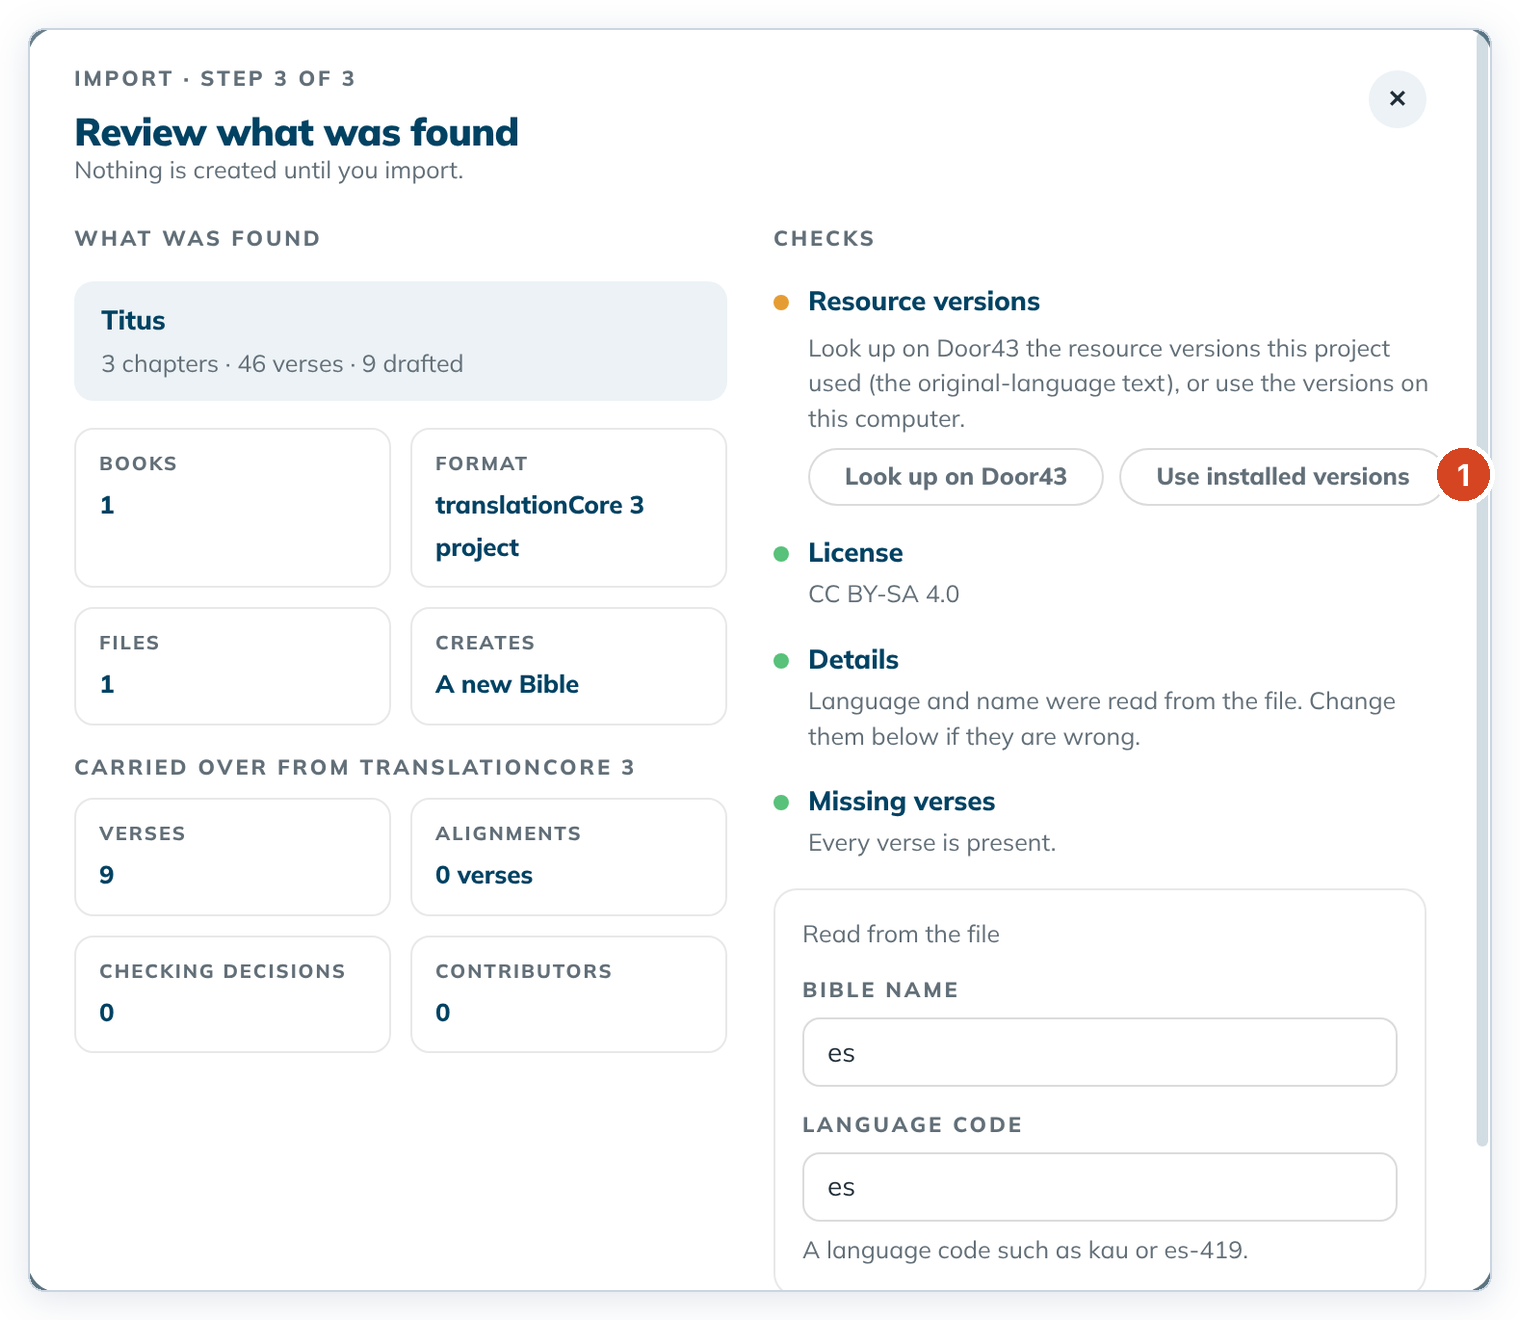
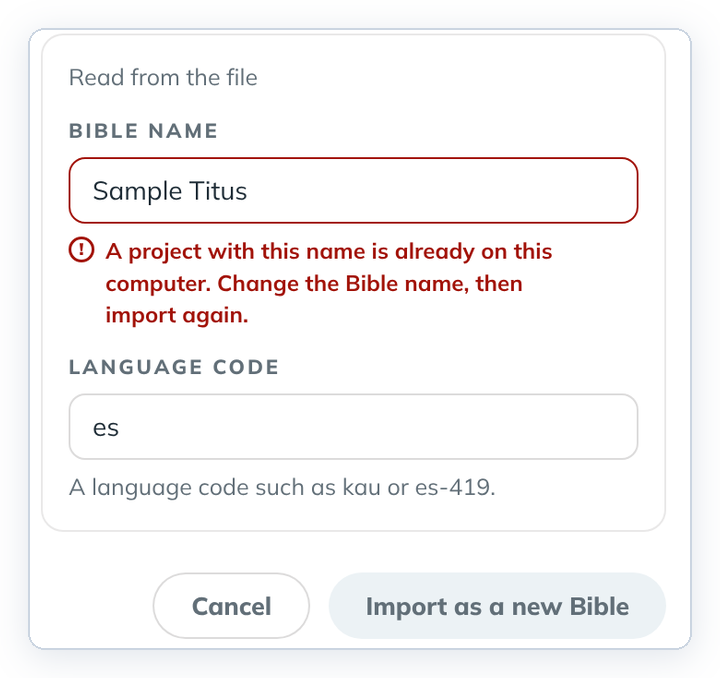
- Check the Bible name and Language code and change them if needed.
- Click Import as a new Bible. Home shows "{name} was imported", and the new card has an Imported badge.
To cancel, click Cancel or the ✕. Nothing is created.
If the import button stays grey
- The name is already used. Type another Bible name.
- USFM files have no language code. Type it yourself, for example
esores-419. - A file is damaged. A red "This file cannot be imported" box gives the reason. Nothing can be imported from that file. See Messages that protect your project.
Good to know
- For a translationCore 3 import, Translation Words Links is pinned to a
_twlrelease (matched by date when looking up on Door43). Languages without a Links repository use the English Links that come with the app.
- Each USFM file must be one book and start with an
\idline. - All translationCore 3 zips in one import must be the same language.
- A Scripture Burrito exported from tC4 also brings its alignments and checking decisions. See Export a project as a Scripture Burrito.
- An imported USFM project has no source texts yet. Add them in Project settings.
- The "was imported" message stays on Home until you close it with its ✕ or restart tC4.
- To add a book to a project you already have, use Add a book › Add books from USFM files.
- A Scripture Burrito without a versification file imports normally. tC4 uses the standard one.
- After a USFM import, the language name on the project card may be blank. Set it in Project settings.