
Create a Bible project
Create a new, empty Bible translation project. You add books right after.
"You'll add books next. Everything here can be changed later."
Steps
- On Home, click + Add a project, then New Bible (1).
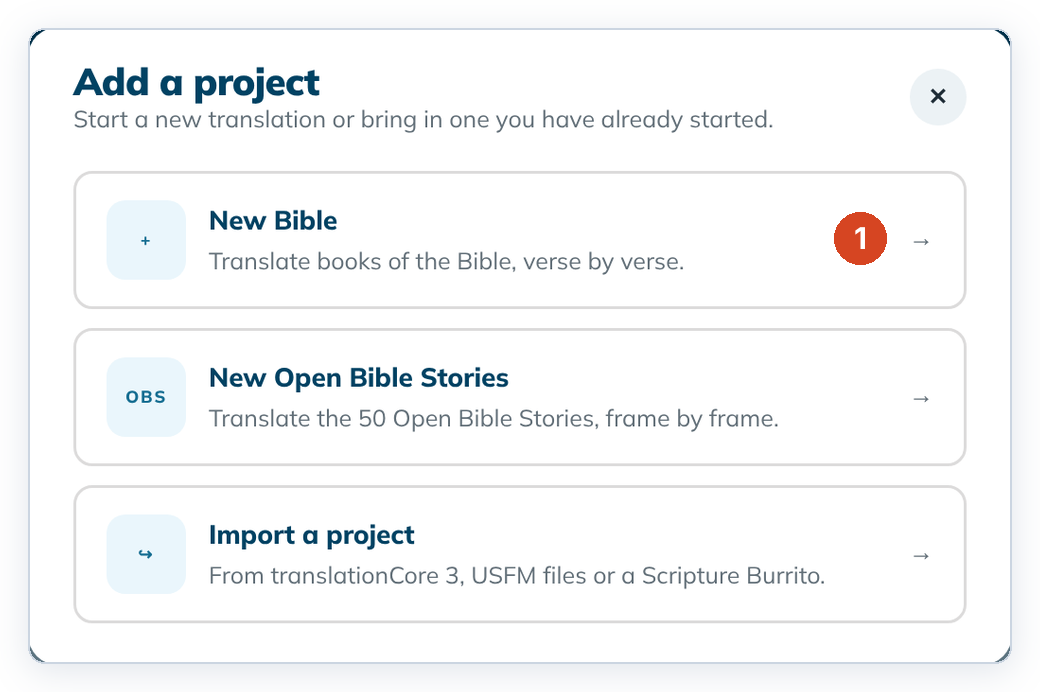
- Type a Bible name, for example
Kanuri Bible. - Type the Language name. When a matching language appears in the list, choose it so Code fills in (for example
French (fr)→fr). You can still type the code yourself. - Choose Left to right or Right to left.
- Leave Checking language on English. It comes with the app, so you don't need to download anything.
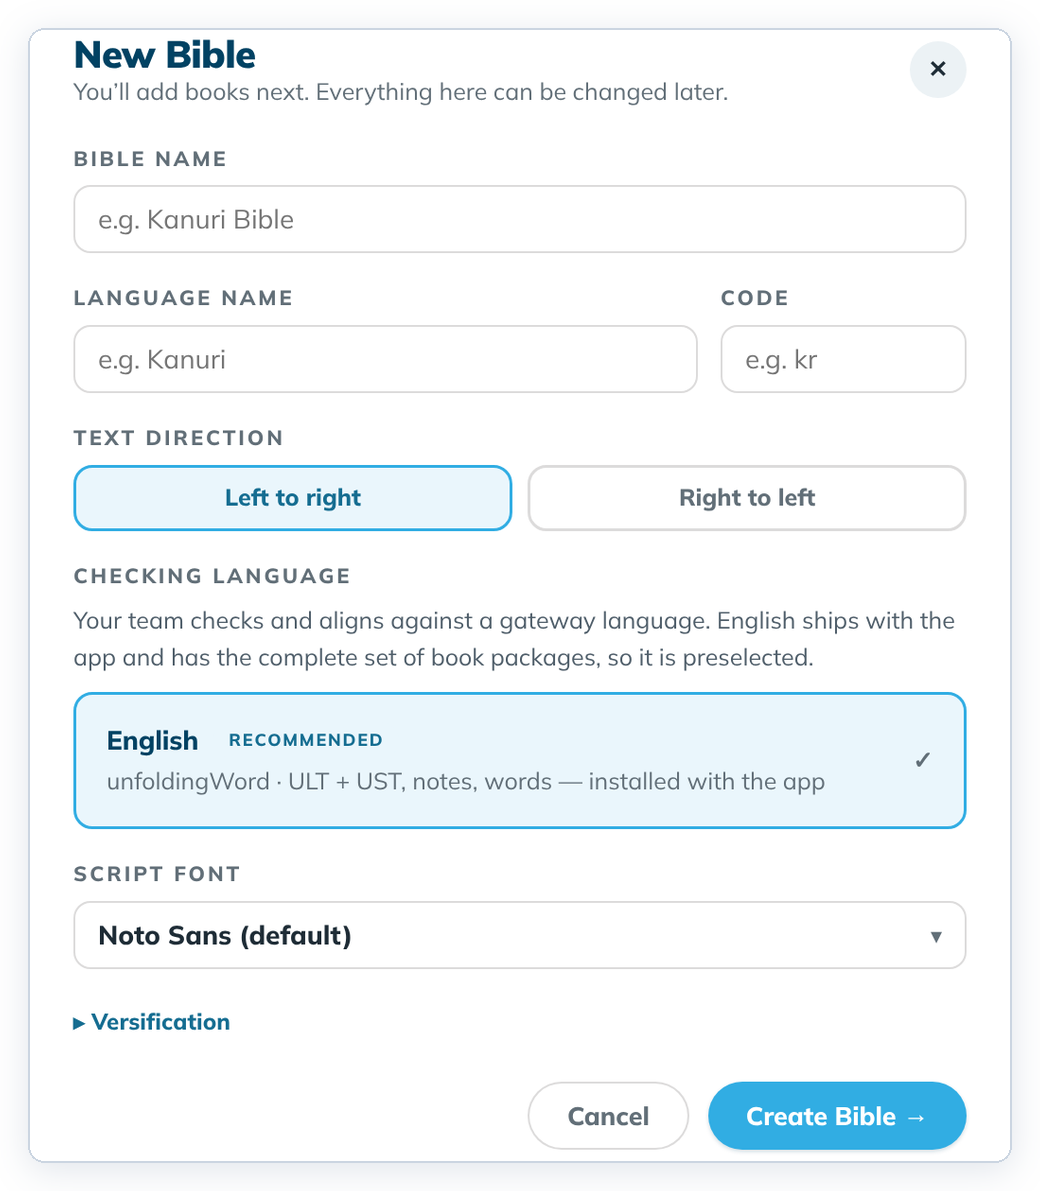
- Click Create Bible →. The Add a book dialog opens. Continue with Add a book.
To cancel, click Cancel or the ✕. Nothing is saved.
Good to know
- The name needs at least one plain letter or digit, because it also names the project folder. If that folder already exists, choose another name.
- Script font sets the font your translation is shown in. Versification is the verse-numbering scheme; most projects keep the default.
- If a language code is refused, try the code for your specific language, for example
kncfor Central Kanuri rather thankau. - Wait a moment after clicking into a field before you type, then check the name. The first letters can be lost.
- You can change text direction and font later in Project settings. The name and language can't be changed yet.